Sometimes my teaching style only keeps me one step ahead of the students! I do try to explore all the possible issues the students may have with whatever I’m teaching, but in some areas I will readily admit to limited experience.
That is true for weaving, which I will be teaching in a couple of weeks. I’m exploring and learning just enough to get a sample to show the students I’ll be with. Fortunately, I can do this because I’ll be teaching with a woman who is a very experienced weaver and she can handle all the hard parts! My sample will be very similar to the level of the student’s work, except that I have a few years more experience with fibers in general!
The plan calls for the students to work with a frame loom that they will make. There are several ways to make these and we will demonstrate and give them the choice. This one is made from push pins in the back of the frame.
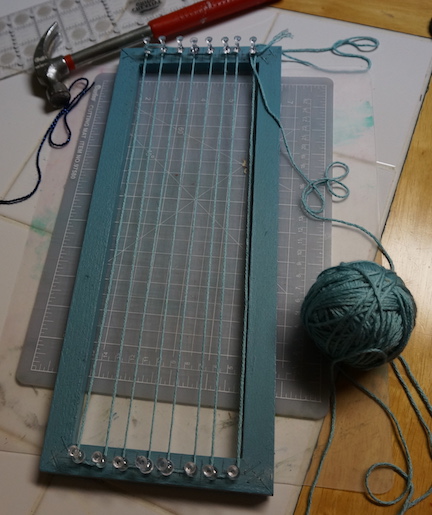
Evenly spaced along the top and bottom and then the ‘string’ (I’m using a bamboo yarn) is wrapped around the pegs.
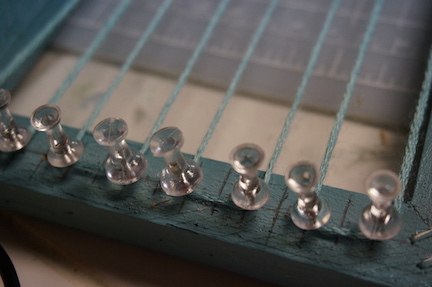
Small nails are often used as well, but I think push pins will be easier for students to use.
When weaving, a bobbin is often used to get the warp threads over and under the weft threads. Doesn’t that sound like I know what I’m talking about? I don’t really know the warp from the weft, but that’s what the dictionary and google are for, right? Anyway, a simple shuttle bobbin can be made out of a bit of cardboard.
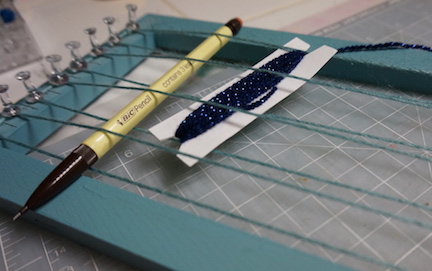
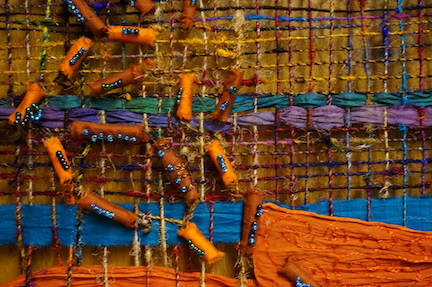
Check out the fancy ‘bridge’, I think it’s called, that separates the strings for easier over and under. That does give you an idea of the size of this project, though.
I found using the bobbin difficult, perhaps because the project is so small. For an alternative, I used a yarn needle and simple pulled the yarn through.
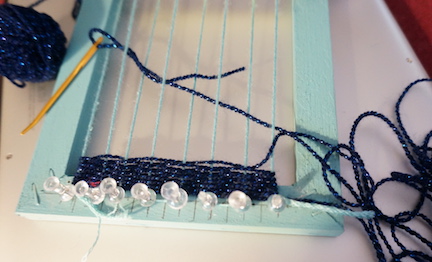
One of the choices the students will have to make is how tightly to weave. Since my plan is for these weavings to remain in the frame as a background, I thought I would do this loosely so the sides remain mostly straight, not pulled in. It may be easier for the students to pull things in a bit more snugly. One more design decision for them!
I haven’t progressed very far on this, but at least I will have learned the basics a couple of weeks before I need to “teach” them! I will have this small sample finished!
Without knowing that I could rely on the expertise of my co-teacher, I never would have embarked on this type of a project. However, I expect some really outstanding results from these middle school aged students. They have no fear and wonderfully creative minds!
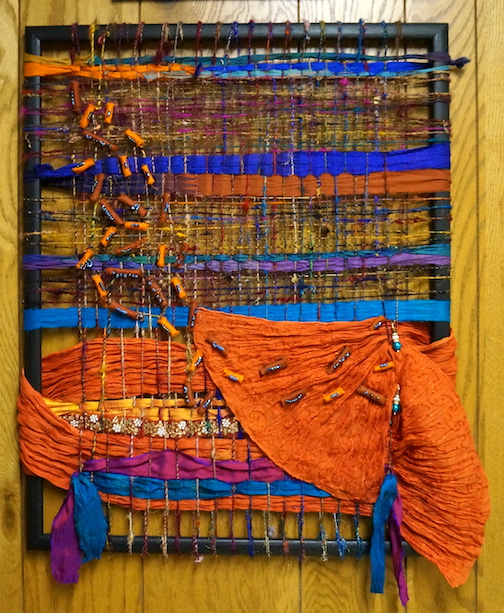
I do have another sample to show them–wild and crazy and not at all the recommended way to make a weaving, but an example of multiple fibers and an alternate way to work.
I’m really looking forward to this experience!


Gorgeous!
LikeLike
Thank you very much. I’m having a lot of fun with this project!
LikeLike
Gosh, this looks like a lot of fun!
LikeLike
It definitely is a lot of fun, no matter how you do it!
LikeLike
Love your scarf challenge piece! It came out really well.
LikeLike
Thanks, Jan. I like how wild it looks!
LikeLike
Wow. I love the colors. Great ideas.
LikeLike
Have to always tell myself that one step ahead is enough to keep from getting caught by the bear! Fun–always!
LikeLike